Connecting Up Your BeagleBone AI
What’s In the Box
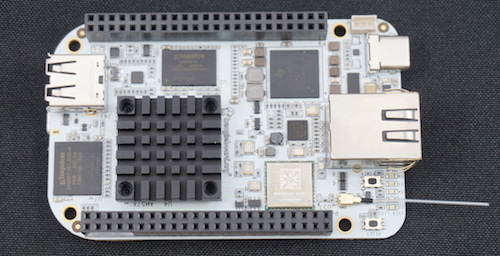
BeagleBone® AI comes in the box with the heat sink and antenna already attached. Developers can get up and running in five minutes with no microSD card needed. BeagleBone® AI comes preloaded with a Linux distribution. In the box you will find:
BeagleBone® AI
Quick Start Guide
TODO: Add links to the design materials for both
What’s Not in the Box
You will need to purchase:
USB C cable or USB C to USB A cable
MicroSD Card (optional)
Serial cable (optional)
More information or to purchase a replacement heat sink or antenna, please go to these websites:
Fans
The pre-attached heat sink has M3 holes spaced 20x20 mm. The height of the heat sink clears the USB type A socket, and all other components on the board except the 46-way header sockets and the Ethernet socket.
If you run all of the accelerators or have an older software image, you’ll likely need fan. To find a fan, visit the link to fans in the FAQ.
Caution
BeagleBone AI can run HOT! Even without running the accelerators, getting up to 70C is not uncommon.
Official BeagleBone Fan Cape: https://www.newark.com/element14/6100310/beaglebone-ai-fan-cape/dp/50AH3704
TODO: create short-links for any long URLs so that text works.
Main Connection Scenarios
This section will describe how to connect the board for use. The board can be configured in several different ways. Below we will walk through the most common scenarios. NOTE: These connection scenarios are dependent on the software image presently on your BeagleBone® AI. When all else fails, follow the instructions at https://beagleboard.org/upgrade
Tethered to a PC
The most common way to program BeagleBone® AI is via a USB connection to a PC. If your computer has a USB C type port, BeagleBone® AI will both communicate and receive power directly from the PC. If your computer does not support USB C type, you can utilize a powered USB C hub to power and connect to BeagleBone® AI which in turn will connect to your PC. You can also use a powered USB C hub to power and connect peripheral devices such as a USB camera. After booting, the board is accessed either as a USB storage device or via the browser on the PC. You will need Chrome or Firefox on the PC.
NOTE:Start with this image “am57xx-eMMC-flasher-debian-10.3-iot-tidl-armhf-2020-04-06-6gb.img.xz” loaded on your BeagleBone® AI.
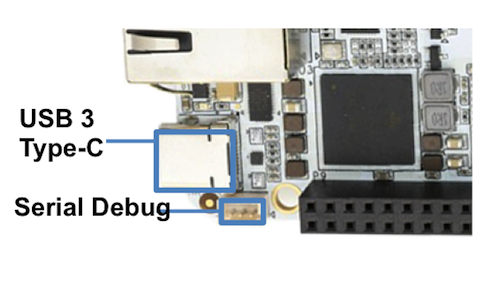
Locate the USB Type-C connector on BeagleBone® AI
Connect a USB type-C cable to BeagleBone® AI USB type-C port.
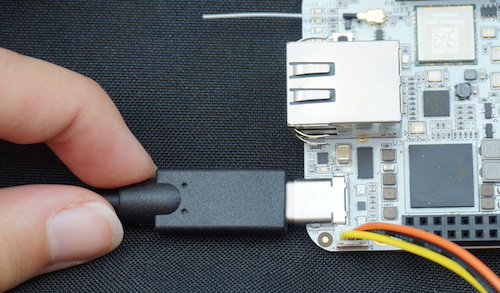
Connect the other end of the USB cable to the PC USB 3 port.
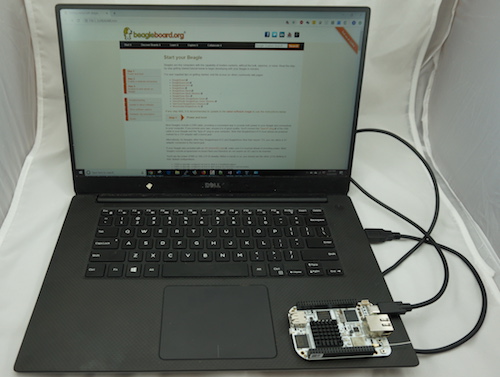
BeagleBone® AI will boot.
You will notice some of the 5 user LEDs flashing
Look for a new mass storage drive to appear on the PC.
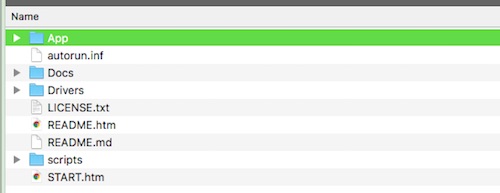
Open the drive and open START.HTM with your web browser.
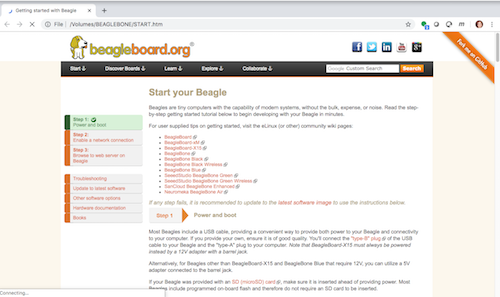
Follow the instructions in the browser window.

Go to Cloud9 IDE.
Open the directories in the left navigation of Cloud9.

Standalone w/Display and Keyboard/Mouse

Note
This configuration requires loading the latest debian 9 image from https://elinux.org/Beagleboard:Latest-images-testing
Load “am57xx-eMMC-flasher-debian-9.13-lxqt-tidl-armhf-2020-08-25-6gb.img.xz” image on the BeagleBone® AI
Presently, the “Cloud 9” application is broken in debian 10 only for this configuration. We re working on a better solution.
Connect a combo keyboard and mouse to BeagleBone® AI’s USB host port.
Connect a microHDMI-to-HDMI cable to BeagleBone® AI’s microHDMI port.
Connect the microHDMI-to-HDMI cable to an HDMI monitor.
Plug a 5V 3A USB type-C power supply into BeagleBone® AI’s USB type-C port.
BeagleBone® AI will boot. No need to enter any passwords.
Depending on which software image is loaded, either a Desktop or a login shell will appear on the monitor.
Follow the instructions at https://beagleboard.org/upgrade
Wireless Connection
NOTE:Start with this image “am57xx-eMMC-flasher-debian-10.3-iot-tidl-armhf-2020-04-06-6gb.img.xz” loaded on your BeagleBone® AI.
Plug a 5V 3A USB type-C power supply into BeagleBone® AI’s USB type-C port.
BeagleBone® AI will boot.
Connect your PC’s WiFi to SSID “BeagleBone-XXXX” where XXXX varies for your BeagleBone® AI.
Use password “BeagleBone” to complete the WiFi connection.
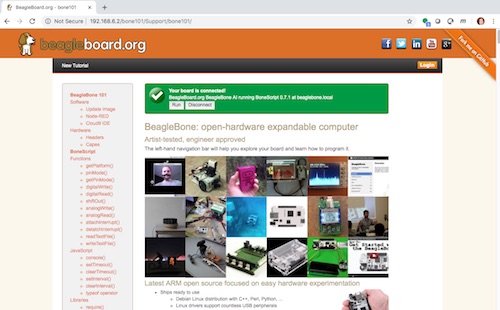
Open http://192.168.8.1 in your web browser.
Follow the instructions in the browser window.
Connecting a 3 PIN Serial Debug Cable
A 3 PIN serial debug cable can be helpful to debug when you need to view the boot messages through a terminal program such as putty on your host PC. This cable is not needed for most BeagleBone® AI boot up scenarios.
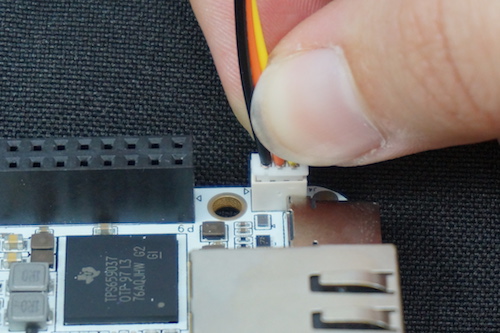
Locate the 3 PIN debug header on BeagleBone® AI, near the USB C connection.
Press the small white connector into the 3 PIN debug header. The pinout is:
Pin 1 (the pin closest to the screw-hole in the board. It is also marked with a shape on the silkscreen): GND
Pin 2: UART1_RX (i.e. this is a BB-AI input pin)
Pin 3: UART1_TX (i.e. BB-AI transmits out on this pin)